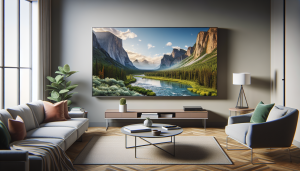
At Utah TV Mounting, we understand the excitement of setting up that sleek, new television but also the frustration that can come with mounting it correctly, especially in tricky corners. DIY corner Tv Mounting can seem daunting, but fear not! This comprehensive guide is here to turn your corner dilemma into a streamlined solution. We’ll walk you through every step, ensuring that your TV is mounted securely and beautifully. Homeowners, this is your ultimate toolkit!
Contents
Choosing the Right Mount
Selecting the perfect mount is crucial for a successful installation. It’s like choosing the right shoes for a hike; without the right fit and support, things could go very wrong.
Consider the size and weight of your TV when choosing a mount. Different mounts support different sizes, so make sure to check the specifications. Also, think about adjustability. Would you like your TV to swivel or tilt? Knowing these factors will make your choice easier.
Also, take into account the mount type. Full-motion mounts offer flexibility, whereas fixed mounts provide stability. So, which one matches your vision?
Gather Your Tools and Materials
No DIY project is complete without the right tools. It’s like trying to cook without the right ingredients—sure, you might get there, but it won’t be as easy or enjoyable.
First, ensure you have a stud finder, a level, a drill with bits, and a screwdriver. These are non-negotiable for effective TV mounting. You’ll also need screws and anchors, which typically come with your mount.
Additionally, think about cable management. Velcro straps or cord covers can make a world of difference in keeping your space tidy.
Locate the Wall Studs
Finding the studs is a game-changer—like discovering a hidden treasure. Wall studs provide the support your TV needs.
Use a stud finder to locate the studs in your wall. Move horizontally until you find them—usually about 16 inches apart. Mark these Locations, as they are your mounting points.
If you can’t find a stud where you need it, consider using toggle bolts for a secure hold.
Marking and Measuring
Accuracy is key here. You wouldn’t want to end up with a lopsided TV that requires constant adjusting.
Start by measuring the height at which you want your TV. Eye level from your seating area is generally best for a comfortable viewing experience. Use a pencil to mark the spots on the wall where you’ll drill.
Double-check these measurements with your level to ensure the mount will be perfectly horizontal.
Drilling the Holes
This step might sound intimidating, but with the right approach, it’s straightforward and satisfying.
Align your mount bracket with the marks you’ve made. Use a drill bit that matches your screws to make pilot holes in the wall. This prevents the wall from cracking or splitting.
Carefully drill into the marked spots, ensuring you’re hitting the studs or using appropriate anchors.
Attaching the Mount to the Wall
Now comes the moment where things start to come together—like putting the final pieces of a puzzle in place.
Place the mount against the wall, aligning it with the holes you’ve drilled. Secure it with screws, ensuring a tight fit.
Check the mount’s level again before tightening completely, so everything remains aligned.
Securing Your TV to the Mount
With the mount in place, it’s time to attach your TV, the centerpiece of this operation.
First, attach the mounting plate to the back of your TV. These usually come with your mount and are specific to your TV model.
Lift the TV and hook or screw it onto the wall mount. Ensure it’s locked or fastened securely to prevent any accidents.
Cable Management Tips
Cable chaos can detract from a beautiful mount. Luckily, keeping things neat is easier than you think.
- Evaluate Cable Length: Measure the length you need before organizing them. This helps in avoiding excess slack.
- Use Velcro Straps: These are perfect for bundling cables together neatly and can be adjusted easily if needed.
- Cord Covers: These hide the cables and make the setup look polished. They can be painted to match your wall color too.
- Label Your Cables: Use small tags to mark what each cable does. This simplifies troubleshooting and future modifications.
- Invest in Wireless Solutions: If possible, consider wireless devices to reduce the number of cables entirely.
Testing Your Setup
Now that everything is in place, it’s time to test. It’s the cherry on top when your efforts pay off with a perfect setup.
Turn on your TV and ensure that the picture quality is what you expect. Check for any tilting or shifting and adjust as necessary.
Also, test any additional features like tilting or swiveling to make sure everything is functioning smoothly.
Maintenance Tips
You’ve done the heavy lifting; now, keep your setup in top shape. Regular maintenance ensures longevity and continued enjoyment.
Periodically check that screws remain tight and that the mount hasn’t shifted. Vibrations from bass-heavy sound systems can occasionally loosen fittings.
Dust the TV and mount regularly to keep your media area fresh and inviting. A clean setup is a happy setup!
At Utah TV Mounting, we’re here to help with any DIY challenges you may face. If you need professional assistance, Contact Us at 801-383-0493 or Request a Free Quote.


