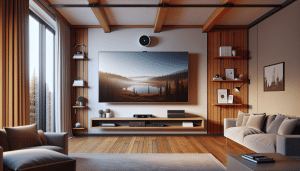
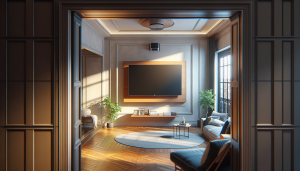
Wall-mounted TVs have become increasingly popular in recent years, and for good reason. Not only do they save space and give a sleek, modern look to any room, but they also provide a better viewing experience. With a wall-mounted TV, you can position it at the perfect height and angle for optimal viewing, eliminating the need to strain your neck or adjust your seating position. In this article, we will guide you through the process of mounting your own TV, from choosing the right wall mount to adjusting the viewing angle.
Contents
- 1 Gather the necessary tools and materials
- 2 Choose the right wall mount for your TV
- 3 Find the perfect spot to mount your TV
- 4 Check for wall studs and electrical wiring
- 5 Measure and mark the spot for your wall mount
- 6 Install the wall mount bracket on the wall
- 7 Attach the mounting plate to the back of your TV
- 8 Hang your TV onto the wall mount bracket
- 9 Adjust the TV to the desired viewing angle
- 10 Double check the stability and safety of your TV mount
Key Takeaways
- Gather all necessary tools and materials before starting the installation process.
- Choose the right wall mount for your TV based on its size and weight.
- Find the perfect spot to mount your TV by considering factors such as viewing distance and room layout.
- Check for wall studs and electrical wiring to ensure a safe and secure installation.
- Measure and mark the spot for your wall mount to ensure proper placement and alignment.
Gather the necessary tools and materials
Before you begin the installation process, it’s important to gather all the necessary tools and materials. Here’s a list of what you’ll need:
- Wall mount bracket: Make sure to choose a wall mount bracket that is compatible with your TV’s size and weight.
- Stud finder: This tool will help you locate the wall studs, which are essential for securely mounting your T
- Level: A level will ensure that your TV is mounted straight.
- Drill: You’ll need a drill to make holes in the wall for the wall mount bracket.
- Screwdriver: A screwdriver will be needed to attach the wall mount bracket to the wall and the mounting plate to the back of your TV
- Measuring tape: Use a measuring tape to determine the exact spot where you want to mount your T Pencil: A pencil will be used to mark the spot on the wall where you’ll be installing the wall mount bracket.
Choose the right wall mount for your TV
When it comes to choosing a wall mount for your TV, there are several options available. The most common types of wall mounts are fixed mounts, tilting mounts, and full-motion mounts.
Fixed mounts are the simplest and most affordable option. They hold your TV flat against the wall and do not allow for any movement or adjustment.
Tilting mounts, on the other hand, allow you to tilt your TV up or down to achieve the desired viewing angle. This is especially useful if you plan on mounting your TV above eye level.
Full-motion mounts offer the most flexibility, allowing you to tilt, swivel, and extend your TV in any direction. This is ideal if you want to be able to adjust the viewing angle from different seating positions in the room.
When choosing a wall mount, make sure to check the weight and size specifications to ensure that it is compatible with your TV
Find the perfect spot to mount your TV
Choosing the right spot to mount your TV is crucial for a comfortable viewing experience. Consider the layout of the room and the seating arrangement when deciding where to place your TV.
You’ll want to choose a spot that allows for optimal viewing from all angles.
The ideal height for mounting a TV is at eye level when seated. This will prevent neck strain and ensure a comfortable viewing experience. If you plan on mounting your TV above a fireplace or in a bedroom, consider using a tilting or full-motion mount so that you can adjust the viewing angle accordingly.
It’s also important to consider the distance between the TV and seating area. The general rule of thumb is that the distance should be about 1.5 to 2 times the diagonal screen size of your TV
For example, if you have a 50-inch TV, the optimal viewing distance would be around 75 to 100 inches.
Check for wall studs and electrical wiring
Before you start drilling holes in your wall, it’s important to check for wall studs and electrical wiring. Wall studs are essential for securely mounting your TV, as they provide the necessary support. You can use a stud finder to locate the studs in your wall.
It’s also important to be aware of any electrical wiring that may be behind the wall. You don’t want to accidentally drill into a wire and cause damage or create a safety hazard. If you’re unsure about the location of electrical wiring, it’s best to consult a professional.
Measure and mark the spot for your wall mount
Once you’ve determined the ideal spot for your TV and checked for wall studs and electrical wiring, it’s time to measure and mark the spot for your wall mount. Use a measuring tape to determine the exact height and distance from the floor or other reference point.
Mark the spot on the wall with a pencil, making sure it is level and centered. Double-check your measurements before proceeding to the next step.
Install the wall mount bracket on the wall
Now that you have marked the spot for your wall mount, it’s time to install the wall mount bracket on the wall. Start by holding the bracket against the wall, aligning it with the marks you made earlier.
Use a drill to make pilot holes in the wall where you will be attaching the bracket. Make sure to use screws that are appropriate for your wall type (e.g., drywall anchors for drywall).
Once the pilot holes are made, attach the bracket to the wall using screws. Make sure it is securely fastened and level.
Attach the mounting plate to the back of your TV
With the wall mount bracket securely installed on the wall, it’s time to attach the mounting plate to the back of your T
Most TVs have VESA mounting patterns, which are standardized hole patterns on the back of the TV that allow for easy attachment of a wall mount.
Refer to your TV’s user manual or look up its VESA mounting pattern online to determine which size screws you will need. Attach the mounting plate to the back of your TV using these screws.
Make sure that the mounting plate is securely attached and level. Double-check the weight and size specifications of your wall mount to ensure that it is compatible with your T
Hang your TV onto the wall mount bracket
With the mounting plate securely attached to the back of your TV, it’s time to hang your TV onto the wall mount bracket. Carefully lift your TV and align the mounting plate with the bracket on the wall.
Gently lower your TV onto the bracket, making sure that it is securely attached. You may need a second person to help you with this step, as TVs can be heavy and awkward to handle.
Once your TV is hanging on the wall mount bracket, give it a gentle tug to make sure it is secure. It should not move or wobble.
Adjust the TV to the desired viewing angle
Now that your TV is securely mounted on the wall, it’s time to adjust it to the desired viewing angle. If you have a tilting or full-motion mount, you can easily adjust the angle by following the instructions provided with your wall mount.
If you have a fixed mount, make sure that you have positioned your TV at the optimal height and angle before securing it to the wall mount bracket.
Take a step back and view your TV from different angles to ensure that it is positioned correctly and provides a comfortable viewing experience.
Double check the stability and safety of your TV mount
Before you consider the installation process complete, it’s important to double check the stability and safety of your TV mount. Give your TV a gentle shake to make sure it is securely attached and does not wobble.
Make sure that all screws are tightened properly and that there are no loose parts. If you notice any issues or concerns, consult the user manual for troubleshooting tips or contact customer support for assistance.
It’s also a good idea to periodically check the stability of your TV mount over time, as screws may loosen over time due to vibrations or other factors.
Mounting your own TV can be a rewarding and cost-effective way to enhance your viewing experience. By following the steps outlined in this article, you can successfully mount your TV on the wall and enjoy the benefits of a sleek, space-saving setup.
Remember to choose the right wall mount for your TV, find the perfect spot to mount your TV, and check for wall studs and electrical wiring before starting the installation process. Measure and mark the spot for your wall mount, install the wall mount bracket on the wall, and attach the mounting plate to the back of your TV
Hang your TV onto the wall mount bracket, adjust it to the desired viewing angle, and double check the stability and safety of your TV mount. With a little bit of patience and careful attention to detail, you can successfully mount your own TV and enjoy a better viewing experience.
If you’re looking for creative TV mounting ideas for small spaces, check out this article from Utah TV Mounting. They offer 7 unique ideas to help you maximize your space and create a stylish and functional setup. From corner mounts to ceiling mounts, there are plenty of options to suit your needs. Whether you have a small apartment or a cozy bedroom, these ideas will inspire you to think outside the box when it comes to mounting your TV. Read more


