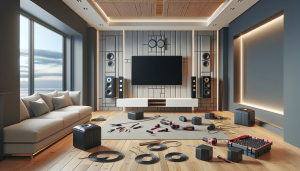
Congratulations on your new smart TV! It’s an exciting addition to your home entertainment setup, but before you can start enjoying all the amazing features, you’ll need to install and configure it correctly. In this blog post, we’ll guide you through the process of smart TV installation, from connecting the hardware to configuring your system. At Utah TV Mounting, we understand the importance of a hassle-free setup, and we’re here to help you make the most of your smart TV.
Contents
- 1 Smart TV: A World of Entertainment
- 2 1. Unpack and Inspect
- 3 2. Choose the Right Location
- 4 3. Connect the Hardware
- 5 4. Power On and Set Up
- 6 5. Update Software
- 7 6. Install Apps
- 8 7. Configure Settings
- 9 8. Enjoy Your Smart TV
- 10 Professional Smart TV Installation
- 11 Contact Us for a Seamless Smart TV Experience
Smart TV: A World of Entertainment
Smart TVs have revolutionized the way we consume media. With built-in internet connectivity and app support, they offer access to streaming services, games, social media, and more—all from the comfort of your living room. To get started, follow these steps:
1. Unpack and Inspect
When you unbox your smart TV, carefully inspect it for any damage or missing accessories. Ensure you have the TV, remote control, power cord, and any included cables.
2. Choose the Right Location
Select the perfect spot for your smart TV. Consider factors like viewing distance, room lighting, and accessibility to power outlets and internet connections.
3. Connect the Hardware
a. Power Connection
Plug in the power cord and connect it to a power outlet or surge protector. Make sure the TV is off before plugging it in.
b. Antenna or Cable Connection
If you plan to watch over-the-air TV channels or have a cable/satellite subscription, connect the appropriate cables to the TV’s input.
c. HDMI and Other Devices
Connect HDMI cables from your external devices such as cable/satellite boxes, Blu-ray players, gaming consoles, or soundbars to the TV’s HDMI ports.
d. Internet Connection
Connect your smart TV to the internet. You can use Wi-Fi or an Ethernet cable, depending on your preference and available options.
4. Power On and Set Up
Turn on your smart TV using the remote control. Follow the on-screen instructions to complete the initial setup, which may include:
- Language selection
- Wi-Fi network connection
- Date and time settings
- Privacy preferences
- Accepting terms and conditions
5. Update Software
Once your smart TV is connected to the internet, check for and install any available software updates. This ensures your TV’s operating system and apps are up to date.
6. Install Apps
Access the app store on your smart TV and install your favorite streaming apps such as Netflix, Hulu, Disney+, and more. You’ll need to log in to your accounts or create new ones if necessary.
7. Configure Settings
Customize your smart TV settings, including picture and sound preferences, parental controls, and any additional features unique to your TV model.
8. Enjoy Your Smart TV
With everything set up, you’re now ready to enjoy your smart TV. Stream movies, watch your favorite shows, play games, and explore the world of entertainment at your fingertips.
Professional Smart TV Installation
While setting up a smart TV can be a DIY project, professional installation ensures that everything is connected correctly, optimized for your specific needs, and that you’re getting the best possible viewing experience. At Utah TV Mounting, our experts can assist you with smart TV installation and configuration, taking the hassle out of the process.
Contact Us for a Seamless Smart TV Experience
For a hassle-free smart TV installation and setup, contact Utah TV Mounting today at 801-383-0493 or visit our website at https://utahtvmounting.com/. Let us help you make the most of your new smart TV and ensure a seamless entertainment experience.


