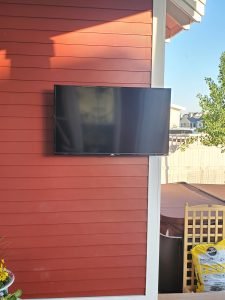
Utah TV Mounting is here to help you make the most of your living space. A corner TV installation is an excellent solution to maximize your room’s layout, but it can be a bit challenging. Don’t worry; this guide will help homeowners like you navigate the process with ease. Whether you’re looking for advice on placement, mounting types, or tools, we’ve got you covered.
Contents
- 1 The Benefits of Corner TV Installation
- 2 Choosing the Right TV Mount
- 3 Optimal Viewing Height and Angle
- 4 Measuring and Marking the Spot
- 5 Gathering the Necessary Tools
- 6 Finding the Studs
- 7 Mounting the Bracket to the Wall
- 8 Attaching the TV to the Bracket
- 9 Concealing Wires for a Clean Look
- 10 Final Adjustments and Testing
The Benefits of Corner TV Installation
Corner TV installations are perfect for utilizing otherwise unused space in your living room or bedroom. By positioning your TV in the corner, you can create a cozy viewing nook that optimizes your room’s layout. This setup also offers a unique viewing angle and can make your space look more organized and intentional.
Another advantage of corner TV installations is the flexibility they offer in furniture arrangement. You can easily place seating arrangements in a more conversational layout, enhancing social interactions and comfort.
Choosing the Right TV Mount
Selecting the perfect TV mount is crucial for a successful corner installation. The options include fixed mounts, tilting mounts, and full-motion mounts. Each of these has its pros and cons depending on your needs.
Fixed mounts keep the TV close to the wall, making it less obtrusive, while tilting mounts allow you to adjust the angle for better viewing. Full-motion mounts offer the highest flexibility, enabling you to swivel the TV to different angles, perfect for multifunctional spaces.
Optimal Viewing Height and Angle
The ideal viewing height for your TV should be at eye level when you are seated. This typically means the center of the TV screen should be around 42 to 48 inches from the floor. However, this can vary based on the height of your furniture and your personal preferences.
Considering the angle is equally important. A slight downward tilt can reduce glare from windows and lights, enhancing your viewing experience. Make sure to test different angles before finalizing the mount’s position.
Measuring and Marking the Spot
Accurate measurements and markings are essential for a flawless corner TV installation. Start by measuring the dimensions of your TV and the available wall space in the corner. Ensure there’s enough clearance on all sides to avoid crowding the area.
Use a pencil to mark the spots where you’ll be drilling holes for the mount. Double-check these marks with a level to ensure they’re even. This step will prevent any unwanted tilting or misalignment.
Gathering the Necessary Tools
- Drill: A power drill will make the job quicker and easier, especially when dealing with studs and drywall.
- Level: Ensures that your TV mount is perfectly horizontal, preventing any unwanted tilt.
- Stud Finder: Helps you locate the studs in your wall for securely anchoring the TV mount.
- Measuring Tape: Essential for accurate measurements and ensuring your TV is at the right height and location.
- Screwdriver: Required for tightening screws and securing the mount to the wall and TV.
Finding the Studs
For a secure and safe installation, it’s crucial to mount your TV on wall studs. Use a stud finder to locate these structural supports within your walls. Mark the edges of the studs with a pencil so you know where to drill.
Mounting your TV directly to the studs will ensure it is stable and can support the weight. If a stud isn’t available at the perfect spot, consider using toggle bolts for additional support.
Mounting the Bracket to the Wall
Once you’ve located the studs and marked the holes, it’s time to attach the mounting bracket. Start by drilling pilot holes into the marked spots. This will make it easier to insert the screws and reduce the risk of splitting the wood.
Align the bracket with the pilot holes and use a power drill or screwdriver to secure it in place. Make sure the bracket is level before fully tightening the screws.
Attaching the TV to the Bracket
With the bracket securely mounted to the wall, the next step is to attach the corresponding part to your TV. Refer to the mounting kit’s instructions for this step, as it varies by model. Generally, you’ll need to screw the mounting plate to the back of your TV using the provided hardware.
Once the plate is attached, lift the TV carefully and hook it onto the wall bracket. Having a second person to assist with this step is beneficial to ensure safety and alignment.
Concealing Wires for a Clean Look
To achieve a professional look, it’s essential to manage and conceal the wires. Use cable management systems like channels or conduits to hide the wires along the walls. Many of these systems are paintable to match your wall color.
For an even cleaner look, consider in-wall cable management. This involves running the cables through the wall, requiring more effort but providing a sleek, clutter-free appearance.
Final Adjustments and Testing
After the TV is securely in place and the wires are managed, make final adjustments to ensure everything is perfect. Check that the TV is level and at the correct angle for optimal viewing.
Finally, turn on the TV and test all connected devices to ensure everything is functioning correctly. Make any necessary tweaks to the angle or position for the best viewing experience.
Experience the best corner TV installation by calling us at 801-383-0493 or Request a Free Quote.


